Straight hair has a naturally clean and polished appearance, but getting it to hold volume throughout the day can be challenging. Many men can create lift immediately after styling, only to see their hair become flat within a few hours.
The solution is not necessarily more styling product. In many cases, the biggest difference comes from how you prepare your hair, how you hold your blow-dryer, and the direction in which you dry each section.
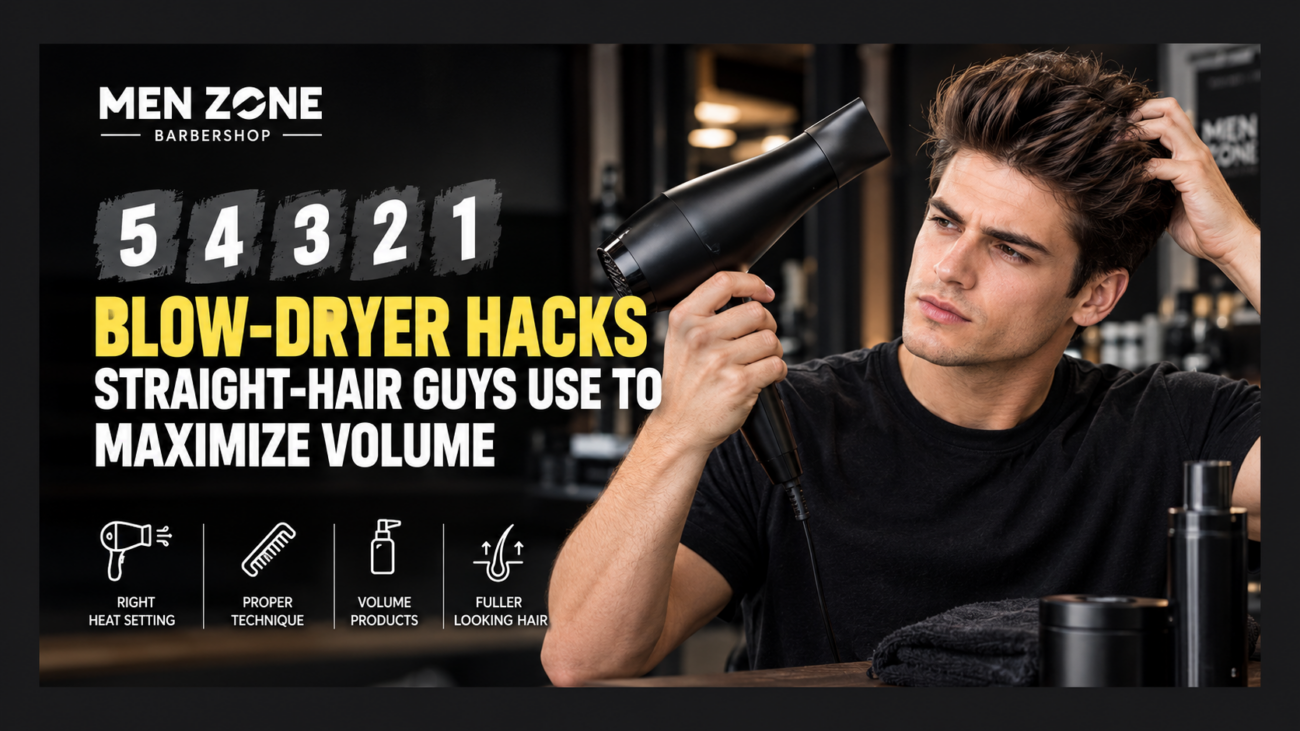
This 5 4 3 2 1 blow-dryer method breaks the process into five easy stages. It is designed for straight-haired men who want natural-looking volume without spending an unreasonable amount of time in front of the mirror.
5 — Start With Properly Prepared Hair
The first step happens before you even turn on the blow-dryer.
After washing your hair, gently towel-dry it until it is damp rather than dripping wet. Avoid aggressively rubbing the hair with a towel. Rough handling can create unnecessary frizz and make the strands harder to control.
Straight hair can become weighed down easily, especially when too much conditioner or a heavy styling product is applied near the roots. Keep your preparation lightweight and focus on maintaining movement.
If you use a pre-styling product, choose something designed to provide light structure rather than a thick cream or greasy formula. A small amount of volumizing mousse or lightweight styling spray can be enough.
The objective at this stage is simple: create a clean foundation for volume before using heat.
4 — Remove Most of the Moisture First
Trying to style soaking-wet hair is one of the easiest ways to make the process unnecessarily long.
Use the blow-dryer on a comfortable setting and move it continuously through your hair. At this point, you are not trying to create the final hairstyle. You are simply removing excess moisture.
Once your hair is roughly 70–80% dry, begin slowing down and paying attention to individual sections.
This transition is important because styling becomes much easier when the hair is damp rather than completely wet. You can begin controlling direction, creating lift, and shaping the hairstyle without continuously fighting against heavy moisture.
Keep the dryer several inches away from your hair rather than pressing the nozzle directly against your scalp.
3 — Lift the Roots
If volume is your goal, the roots deserve most of your attention.
Instead of simply pointing the dryer at the top of your head, use your fingers to lift sections upward. Direct warm airflow toward the roots while keeping the hair elevated.
Work gradually from one section to another.
For example, you can start around the front, move toward the crown, and then work through the remaining top sections. If your hair naturally falls forward, temporarily lift it upward and slightly backward while drying.
This creates a foundation for height.
A common mistake is focusing heavily on the ends while ignoring the roots. The ends may look styled, but if the roots remain flat, the entire hairstyle can collapse.
For a natural finish, do not try to make every strand perfectly vertical. Controlled lift combined with slight movement usually looks more effortless.
2 — Change the Direction of the Airflow
The direction of your blow-dryer can completely change the final appearance of your hairstyle.
If you always dry your hair in the same direction that it naturally falls, you may reinforce the flat shape. Instead, gently move the hair against its natural direction while applying warm airflow.
Once the roots have some lift, guide the hair into the direction you actually want it to sit.
This technique works particularly well for quiffs, textured styles, side parts, and other hairstyles where height at the front is important.
A professional Barber Near Me can also demonstrate this technique during a haircut appointment, especially if you are unsure which direction your hair should be dried.
The goal is not to force the hair into an unnatural position. You are simply creating temporary lift before placing the hair into its final shape.
1 — Finish With Cool Air
The final step is often overlooked.
After you have shaped a section with warm airflow, use the cool-shot function for several seconds. Keep the hair in its desired position while applying the cooler airflow.
A simple sequence is:
Warm air → lift → shape → cool air → release.
This gives you a cleaner finishing process and can help the hairstyle maintain its shape for longer.
Pay particular attention to the front and crown because these areas often lose volume first.
Once everything is dry, use your fingers to separate the hair and create natural texture. If additional hold is necessary, apply a very small amount of lightweight matte paste or clay.
Remember that straight hair can become flat when overloaded with product. Start small and add only what you actually need.
Why Straight Hair Loses Volume
Understanding why your hair becomes flat can help you fix the problem more effectively.
Several factors can contribute to a lack of volume:
- Heavy styling products
- Excess conditioner around the roots
- Drying the hair downward
- Not lifting the roots
- Using excessive heat
- Choosing a haircut with too much weight
- Applying too much finishing product
- Allowing moisture to remain in the hair while styling
Your hair type also plays a role. Fine straight hair generally requires a lighter approach, while thick straight hair may require more controlled airflow and additional shaping.
Instead of trying to make your hair dramatically taller, focus on creating balanced volume that works with your natural density.
Your Haircut Is Part of the Volume Strategy
A blow-dryer can improve the appearance of volume, but it cannot completely overcome an unsuitable haircut.
The length and weight of the hair influence how easily it can be lifted. If the top is extremely heavy, the roots may struggle to support the shape. If the hair is cut too short, there may not be enough length to create the desired movement.
This is where communication with your barber becomes important.
Before your next appointment, explain how you normally style your hair. Tell your barber whether you use a blow-dryer, how much time you have in the morning, and whether you prefer a natural or structured finish.
That information can help determine the right amount of length and texture for your hairstyle.
You might also like: What Top Barbers Use: The Exact Products Behind the Red-Carpet Look
How to Get Better Results at Home
You do not need professional equipment to improve your technique.
A basic blow-dryer with adjustable heat and airflow settings can be enough. A concentrator nozzle can provide more directional airflow, while your fingers can provide surprisingly good control for textured styles.
Try to develop a consistent routine rather than changing your technique every morning.
Start with damp hair, remove excess moisture, lift the roots, direct the airflow strategically, and finish with cool air. Once you repeat this process several times, the technique becomes much faster.
The biggest improvement often comes from consistency rather than buying another styling product.
Choosing the Right Hairstyle for Straight Hair
Straight hair gives you plenty of styling options.
A textured quiff can create height at the front. A side part can provide a clean and professional appearance. A modern textured crop can use controlled volume without requiring significant height.
If you prefer a relaxed look, finger styling can create separation without making the hairstyle appear overly polished.
If you want a more formal appearance, a brush can provide greater control over direction and shape.
The best hairstyle is ultimately one that fits your hair density, face shape, lifestyle, and willingness to style it every morning.
Professional Grooming Can Simplify Your Routine
A good haircut should not only look impressive when you leave the shop. It should also be practical enough for you to recreate at home.
Men Zone focuses on helping clients achieve hairstyles that fit their individual preferences rather than forcing everyone into the same look.
When discussing your haircut, explain exactly what you want your hair to do. Saying that you want “more volume” is useful, but explaining whether you want height at the front, fullness at the crown, or overall texture gives your barber much more information to work with.
Finding the Right Local Barber
Your local haircut experience can make a major difference in how easily you maintain your style.
If you are searching for a Barber Eglinton, consider looking beyond the haircut itself. Pay attention to whether the barber asks questions, understands your hair type, and gives you practical styling advice.
A barber who understands how straight hair behaves can help you select a length and shape that requires less effort at home.
For men who regularly use a blow-dryer, this consultation can be particularly valuable because the haircut can be designed around the way you actually style your hair.
A Simple Routine You Can Remember
The entire method can be reduced to five numbers:
5 — Prepare: Start with clean, damp hair and lightweight preparation.
4 — Dry: Remove most of the moisture before serious styling begins.
3 — Lift: Concentrate airflow around the roots to create height.
2 — Direct: Change the airflow direction to shape the hairstyle.
1 — Cool: Finish with cool air before releasing the hair.
After that, use your fingers and a small amount of styling product only if necessary.
This routine keeps your morning grooming simple while giving you considerably more control over straight hair.
When You Need a New Haircut
Sometimes the problem is not your blow-dryer technique at all.
If your hair has become difficult to style, the top feels excessively heavy, or your usual hairstyle no longer holds its shape, it may simply be time for a fresh cut.
A suitable Haircut Eglinton can help restore the structure of your hairstyle and make your daily blow-drying routine much easier.
Instead of asking for a completely different hairstyle, you can explain what is currently difficult to manage. Your barber can then suggest adjustments to length, texture, and weight distribution.
What Makes a Good Volume Routine?
The best volume routine is one you can realistically repeat.
You do not need to spend 30 minutes styling your hair every morning. A few intentional minutes can be enough when your haircut, drying technique, and product selection are working together.
Men Zone Barbershop takes a practical approach to men’s grooming by focusing on the relationship between the haircut and everyday styling.
If your straight hair repeatedly falls flat, consider changing one factor at a time. Start with root direction, then experiment with airflow, finishing technique, and product quantity.
Small adjustments can produce a surprisingly noticeable difference.
Final Thoughts
Creating volume in straight hair is less about using maximum heat and more about controlling moisture, direction, and timing.
The 5 4 3 2 1 method gives you an easy framework to remember: prepare the hair, remove excess moisture, lift the roots, direct the airflow, and finish with cool air.
Once you understand how your hair responds, styling becomes less frustrating and much more predictable.
The right haircut provides the foundation, while the right blow-drying technique brings that foundation to life. With a little practice, straight-haired men can achieve fuller-looking, textured styles without making their grooming routine complicated.
FAQs
1. How can I make straight hair look more voluminous?
Start with damp hair, use lightweight products, lift the roots while blow-drying, and direct warm airflow against the natural direction of your hair. Finish with cool air to help set the shape.
2. Should I blow-dry my hair upward?
If you want additional root lift, gently lifting the hair upward while directing warm airflow toward the roots can help create volume. Once the roots are lifted, guide the hair into your preferred final direction.
3. Is high heat better for creating volume?
Not necessarily. High heat is not required for good volume. Moderate heat gives you more control and can be more comfortable for regular styling. Keeping the dryer moving is also important.
4. Why does my hair become flat after I style it?
Flatness can result from heavy products, excess moisture, insufficient root lift, incorrect airflow direction, or too much weight in the haircut. Identifying the cause is more useful than simply adding more product.
5. How long should I blow-dry straight hair?
There is no universal time because hair length and thickness vary. Dry until most moisture is gone, then spend additional time shaping the roots and top. Stop once the hair is completely dry and positioned correctly.
6. Should I use a brush or my fingers?
Both can work. Fingers are excellent for casual texture and natural movement, while a brush provides more control for structured hairstyles such as side parts and quiffs.
7. What product should I use for straight hair?
Lightweight products are generally easier to work with when volume is the goal. Depending on your hair type and desired finish, you might consider a volumizing mousse, light styling spray, matte paste, or lightweight clay.
8. Can a haircut make straight hair look fuller?
Yes. The distribution of length, weight, and texture can affect how easily hair can be lifted and styled. A haircut designed around your natural hair characteristics can make daily styling much easier.
9. Should I use the cool-shot button every time?
It is not mandatory, but it can be a useful finishing step. After shaping a section with warm air, cool airflow can help you finish the style without continuing to apply heat.
10. How do I explain the hairstyle I want to my barber?
Bring a reference photo if possible and explain how you normally style your hair. Tell your barber whether you want natural volume, strong height, texture, or a cleaner finish. Your daily styling routine is useful information when deciding the haircut structure.
Add a Comment